Thanks for coming to read about my entry into the Great Cakes Soapworks' June Ebru Challenge! I was very excited about this challenge because it gave me the opportunity to try some techniques I've never done before.
 |
| Apple Jack and Peel by WSP |
With Fall on it's way, I wanted to make a soap with one of my existing scents that I bought a few months ago. The one I chose to work with was Apple Jack and Peel by WSP. Although I'd heard that it can accelerate trace a little, I still wanted to use it to create this soap.
I read about the subject of the challenge and started researching straight away. So many beautiful Ebru techniques to choose from...I wasn't sure how I'd pick just one to try. I knew I was drawn to circle swirling designs. I really love how those look and I wanted to make sure I used those techniques in my soap.
My challenge was to come up with something that represented "FALL" to me. While sitting on my laptop researching Ebru techniques, I looked up and saw this on the wall.
It's a scrapbook picture I created a long time ago. Each leaf on the tree represents a different person in our family. When someone is born, leaves get added and when someone passes away, their leaf finds it's way to the bottom of the page surrounding the tree. I really love this - it's our family tree.
Tree....think only tree... (yes, I love the Karate Kid :) )
 |
| My Father's Favorite Tree - Sugar Maple |
My thoughts drifted back to my childhood and the house I grew up in. We lived on a full acre of land and had tons of trees. But, one in particular that was my father's favorite tree was a sugar maple tree that was situated just outside the back door. Every year he'd comment how beautiful it was and would marvel at all the different color patterns and how bright they were. We'd spend long times together just talking about it, which are some of my favorite memories of him. He died when I was 19 and the tree needed to be chopped down a few years later due to disease.
 |
| My Dad - miss him so much! |
My father was truly a lover of nature - which is probably how I became a lover of nature myself. He'd take pictures like this of trees in the yard all the time...just because he loved the beauty of them. He would also take endless pictures of lakes, mountains, chipmunks....you name it. I have tons of these pictures in files on my computer and I love to look at them. He had a true artist's eye when it came to taking a great picture.
I found this picture online and it solidified my choice. Trees are done in Ebru art - so why not give it a try???
These are the inspirations behind my challenge soap, our family tree and the beautiful sugar maple my father and I loved so much when I was a kid. I wasn't quite sure how I was going to pull this off, but I figured it would all come together...somehow :).
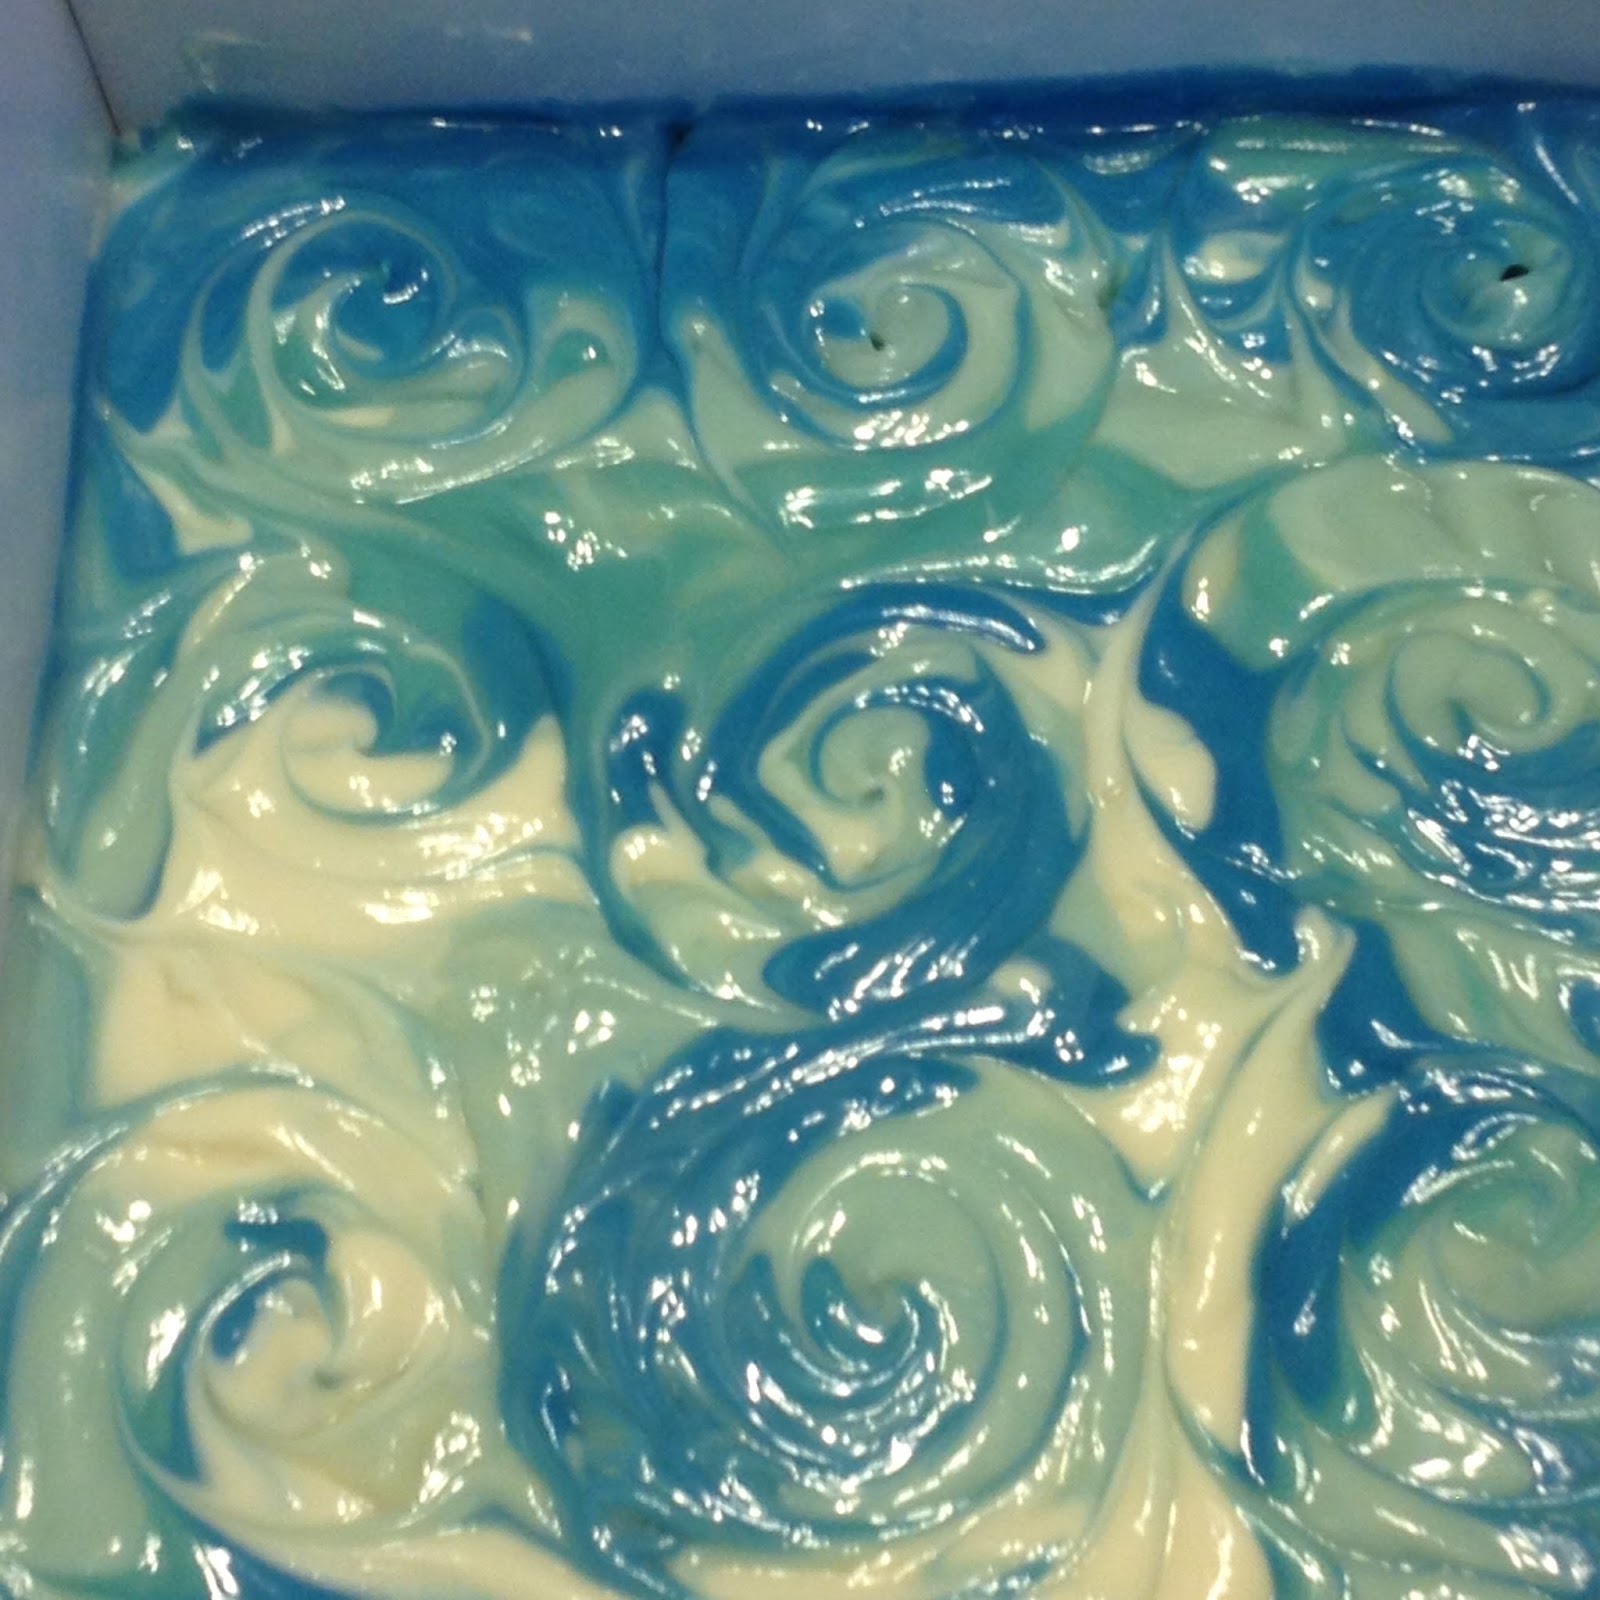
I spent a good, solid week planning my challenge soap which included some input from my husband, Dave. He suggested that if I was using red, yellow and orange leaves, that I might want to do some sort of blue background for the tree. Originally I had thought I'd use an 'in-the-pot' swirl for this, but I really wanted to try the whirlpool Ebru technique i'd seen.

I started by gaining inspiration for my colors. I found a color pallet that looked interesting to me, so I printed it out. The little dots on the page are my micas in oil that I used. I was trying to get the colors just the way I wanted them.
I would use three different blues and white for the background, copper and brown for the tree trunk and red, orange and yellow/gold for the leaves. Any more colors that that and I was going to need more ramekins to mix them with!
Here are the colors that I used:
I decided to go with a recipe I'd been using for the last few batches. It includes avocado oil and goat milk which I find that I really love the feel of when I try them out in the shower. The last batch I made traced really slowly, so I figured it would be a good one to use.

That was until I added the goat milk to the oils and stick blended it. It began to seize up immediately! Seriously...this has never happened to me before...seizing BEFORE adding the lye!
But, I figured I'd come this far, so I needed to add the lye and see what happens. Thankfully, the batter thinned out with the addition of the lye water. I stick blended until it just came to emulsification. Then, it was time to split the batter into 4 colors and get ready to pour.
I was planning on using the funnel pour over a wooden block technique for this part. My plan was to have a fluid batter that flowed easily down the sides of the block and created an interesting pattern. Um...that would have been great if my batter hadn't begun to thicken FAST. Yes...guess that FO 'does' accelerate trace....ugh :)
Here's the soap after pouring (glopping really...) it into the center of my mold and then slamming it against the ground. This caused my children to freak out and run upstairs to see which one of their parents was going to need an ambulance ride :) Once they saw it was just Mom making soap again...the eyerolling ensued and they trotted back down to the basement to play Xbox.
At least I know they care!!
My first Ebru technique was inspired by the whirlpool design I'd seen so many times. I love this and it was so much fun to do. The left is the inspiration and the right is my interpretation of it. I think it came out pretty good!!
Now I had the base, it was time to trace the tree design onto my soap. I cut out my drawing I'd done in order to place this onto the soap and use a bamboo skewer to trace around it to get the shape of the tree. Here's what that looked like:
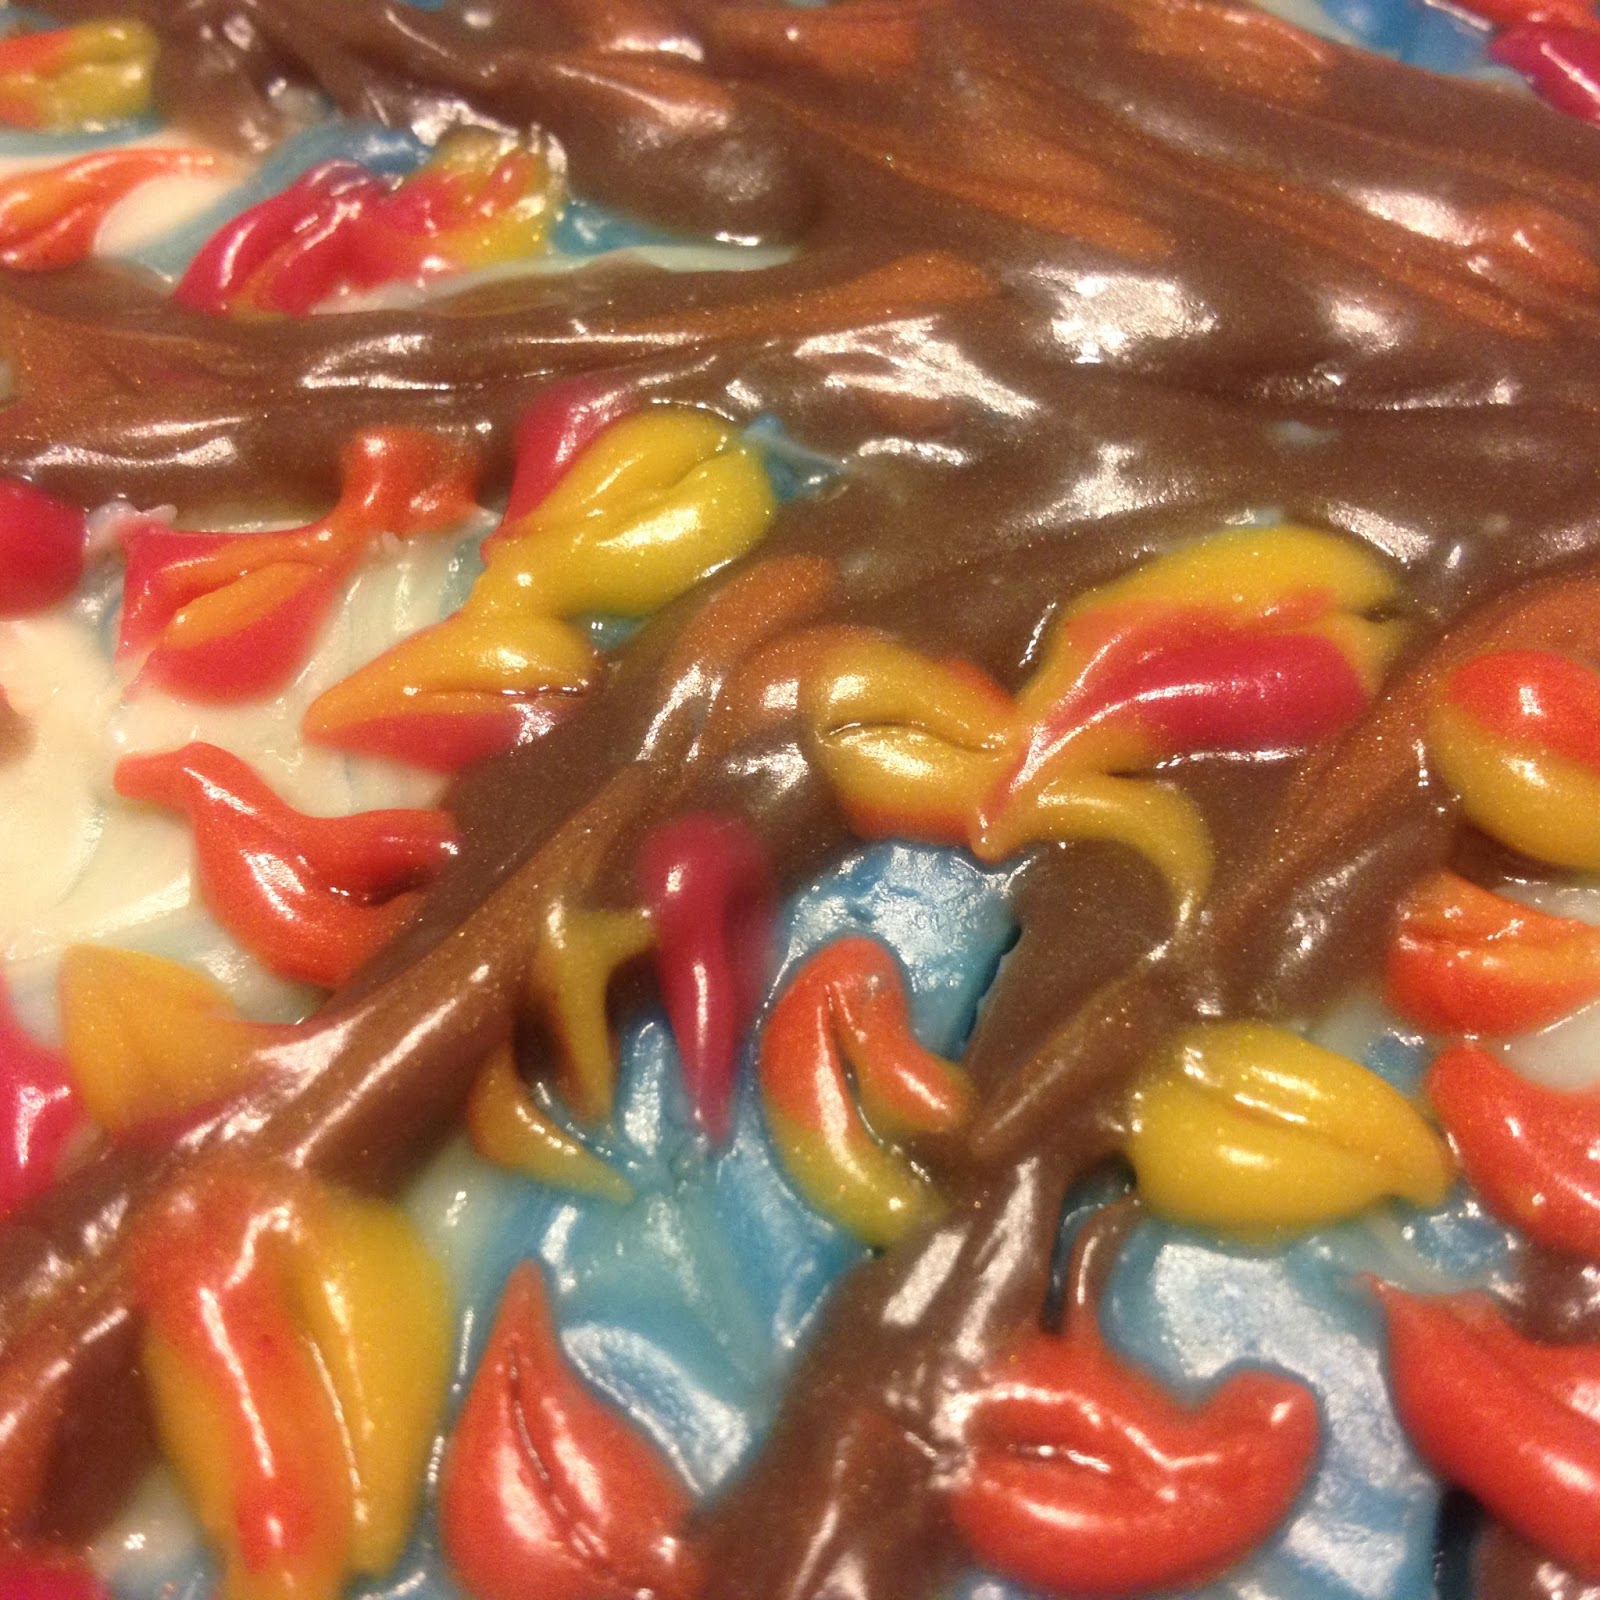
The tree proved to be much more difficult than I had thought it was going to be. I used squeeze bottles to lay down lines of brown and copper colored soap. I then used a skewer to move through them and create another Ebru technique I'd seen before.
It is a peacock swirl technique created with a bamboo skewer. I liked the way it looked when I started it! Now...the tree branches proved to be a pain in the you-know-what. My soap wasn't going where I wanted it to, so they turned out a little sloppy.
Now onto the final part...the leaves. This proved to be even more challenging than the tree! My inspiration came from Ebru hearts. To me, they look a lot like leaves. So, I decided to use these for my challenge.
After an hour or so of playing....I finally put the design to bed and called it finished. Truth be told, I could have gone on for hours and hours fixing and adding. But, my soaps were getting VERY thick so I called it a day... 5 HOURS LATER.....Here is the soap right before I put the cover on it and put it to bed.
I have to admit I'm torn....there's a part of me that wants to cut into this sucker and see what the inside looks like. But, then there's the other part of me that doesn't want to destroy my first piece of soap art. For now, this soap is safe from my cutter. It will go into a shadow box and put on the wall of my craft room. But...if I ever do cut it...I'll make sure you guys see the results!
Thanks Amy for hosting this challenge! It was a real blast to stretch my wings and see what I could do. Can't wait till' next month!